Set up CloudWatch alarms and SNS topics in AWS
Day-46

What is Amazon CloudWatch?
Amazon Simple Notification Service is a notification service provided as part of Amazon Web Services since 2010. It provides a low-cost infrastructure for the mass delivery of messages, predominantly to mobile users.
What is Amazon SNS?
Amazon Simple Notification Service is a notification service provided as part of Amazon Web Services since 2010. It provides a low-cost infrastructure for the mass delivery of messages, predominantly to mobile users.
Task
Create a CloudWatch alarm that monitors your billing and sends an email to you when it reaches $2.
To enable the monitoring of estimated charges
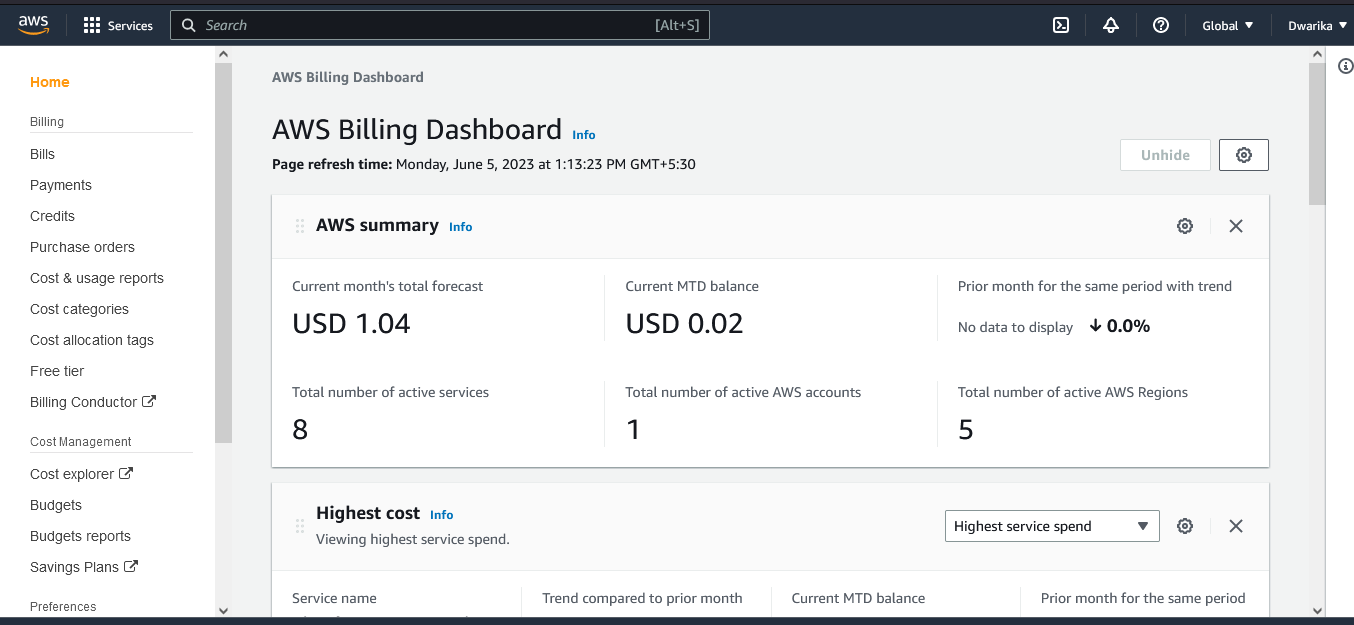
Open the AWS Billing console at console.aws.amazon.com/billing.
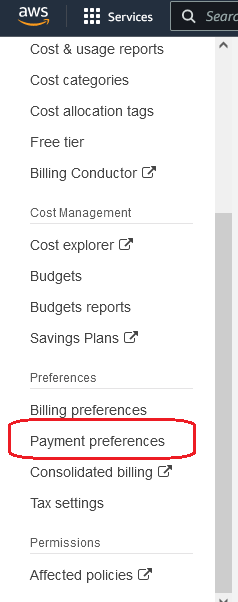
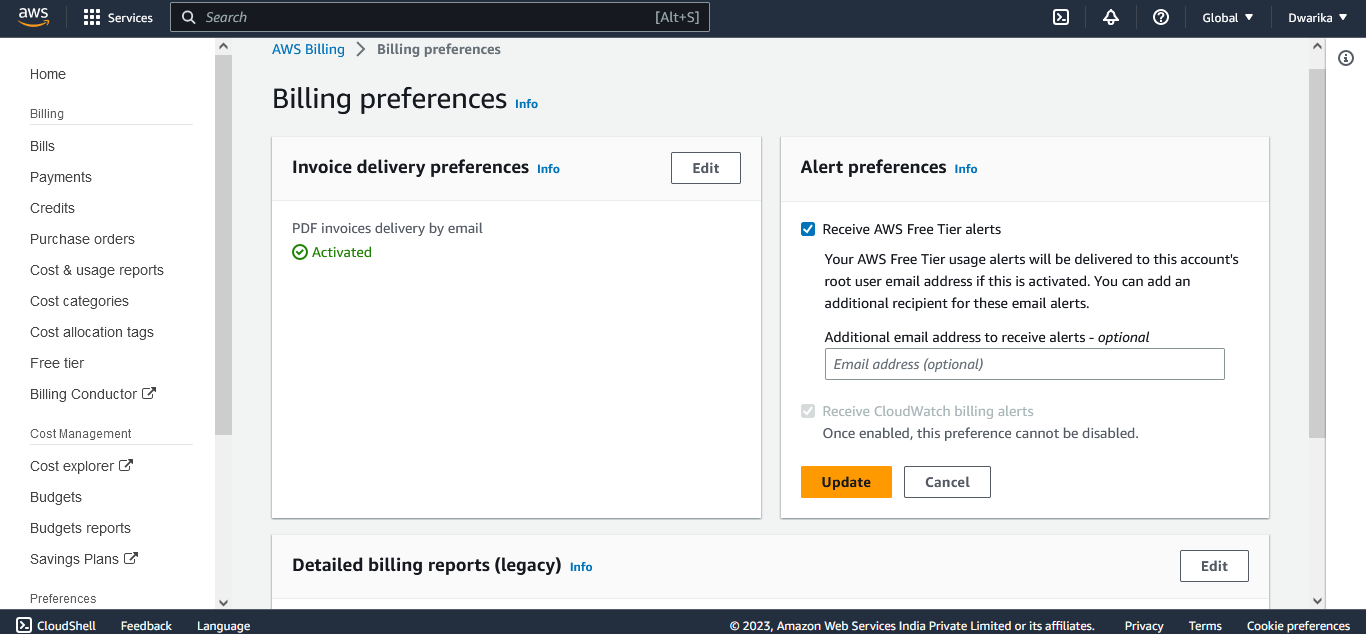
In the navigation pane, choose Billing Preferences.
Choose to Receive Billing Alerts.
Click on alert preferences

Choose Save preferences.
Creating a billing alarm
Open the CloudWatch console
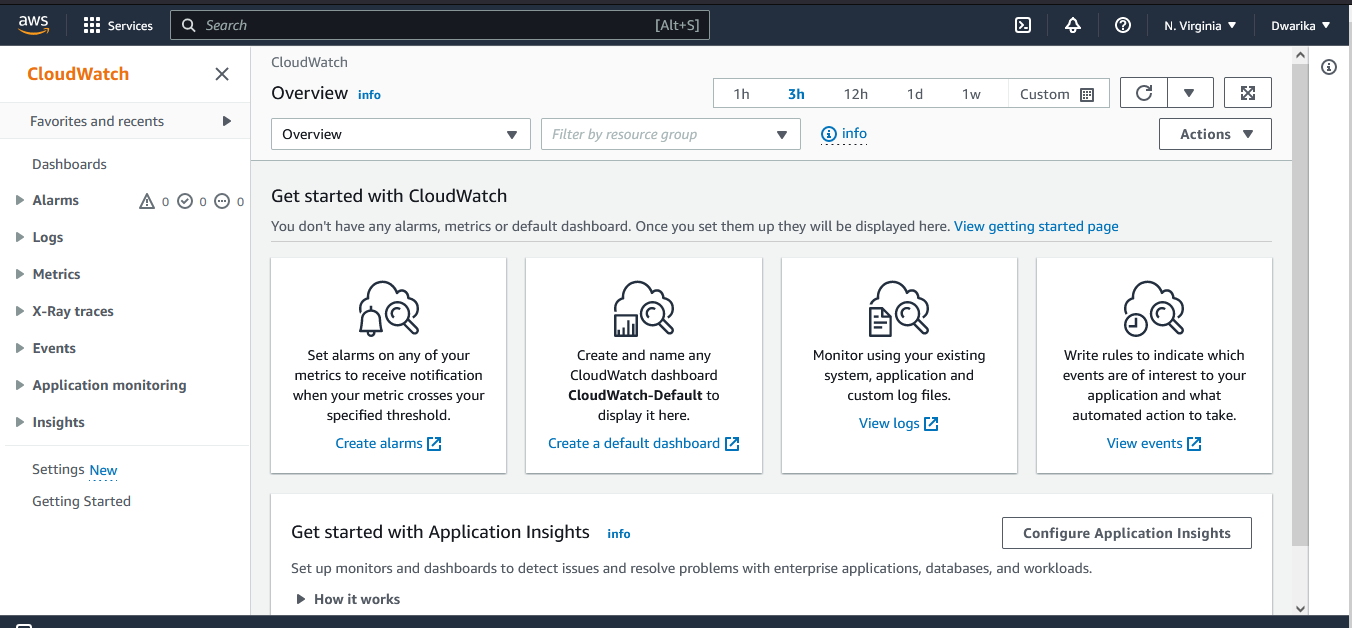
In the navigation pane, choose Alarms, and then choose All alarms.
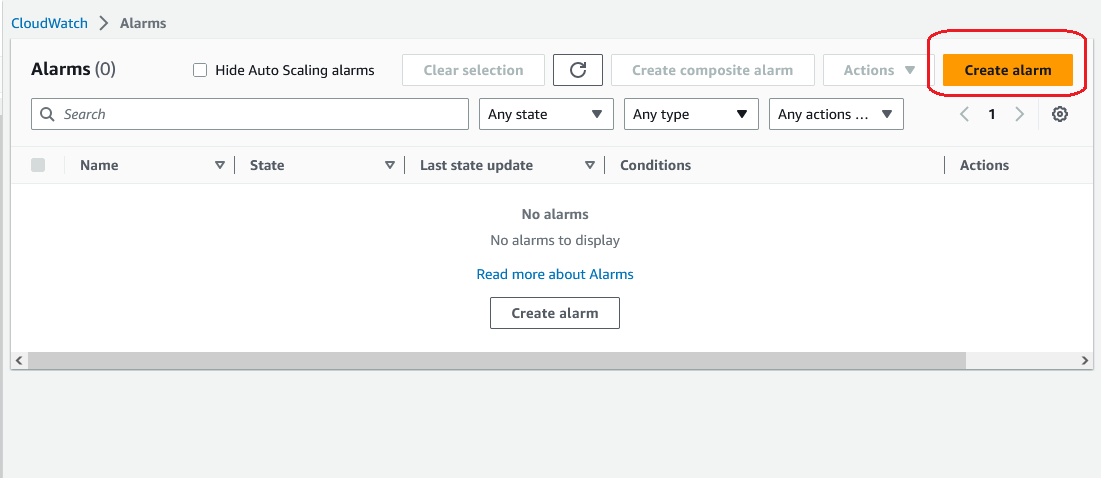
Choose to Create Alarm.
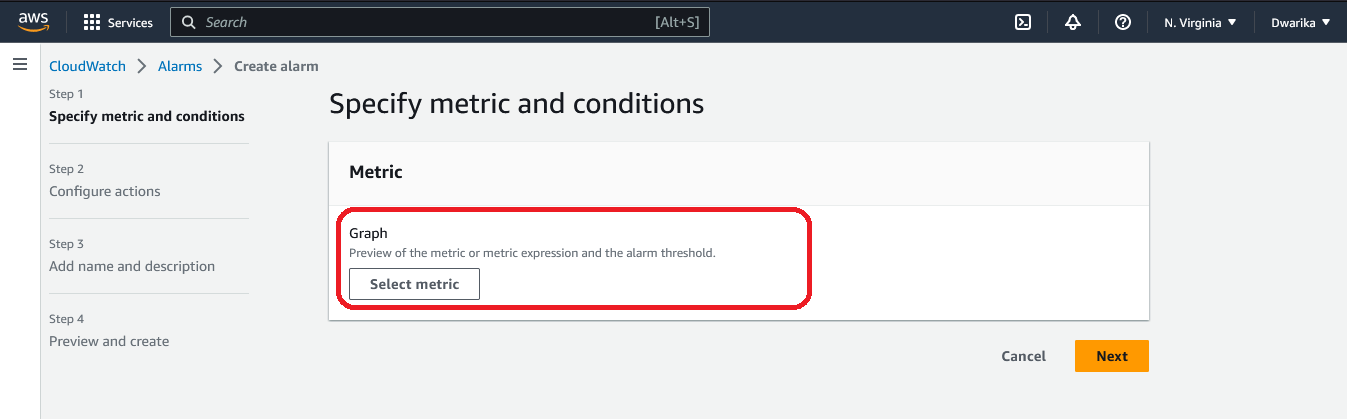
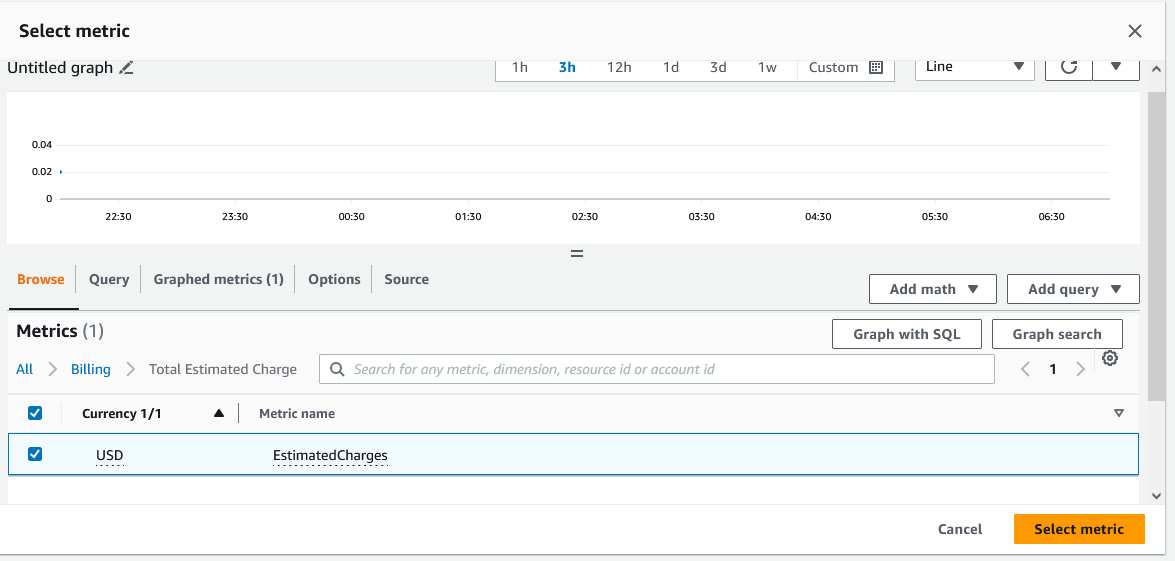
Choose Select metric.
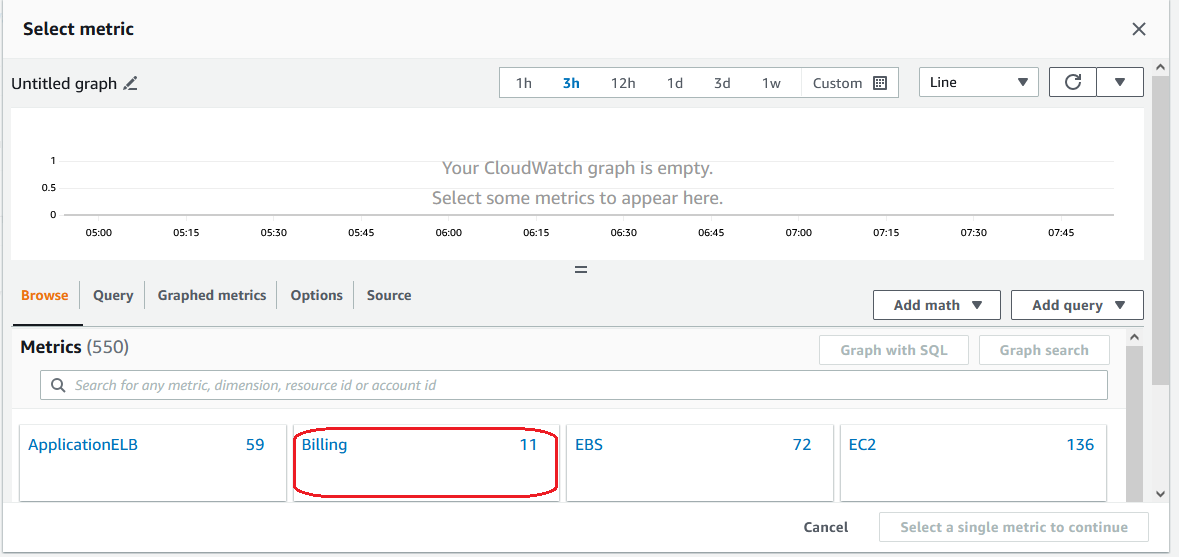
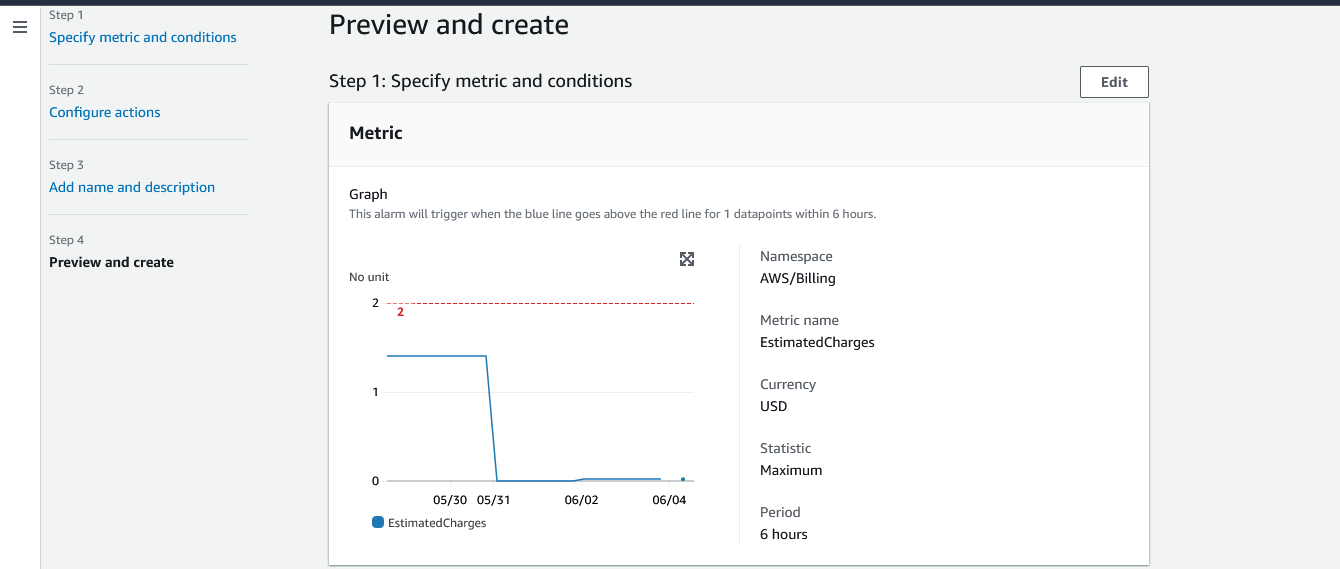
In Browse, choose Billing, and then choose Total Estimated Charge.
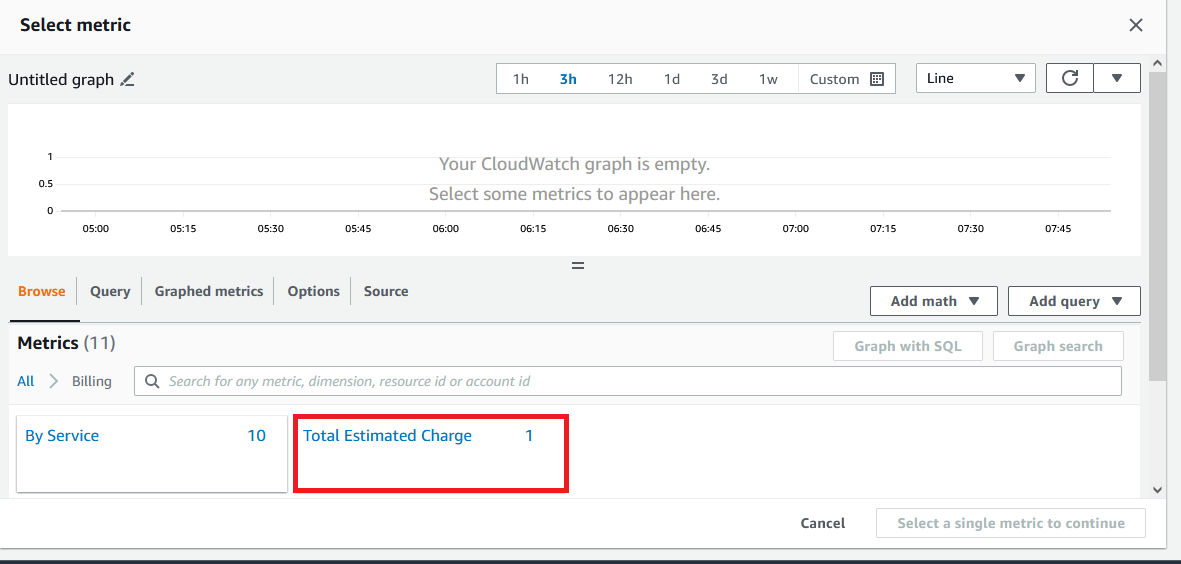
Select the box for the EstimatedCharges metric, and then choose Select metric.
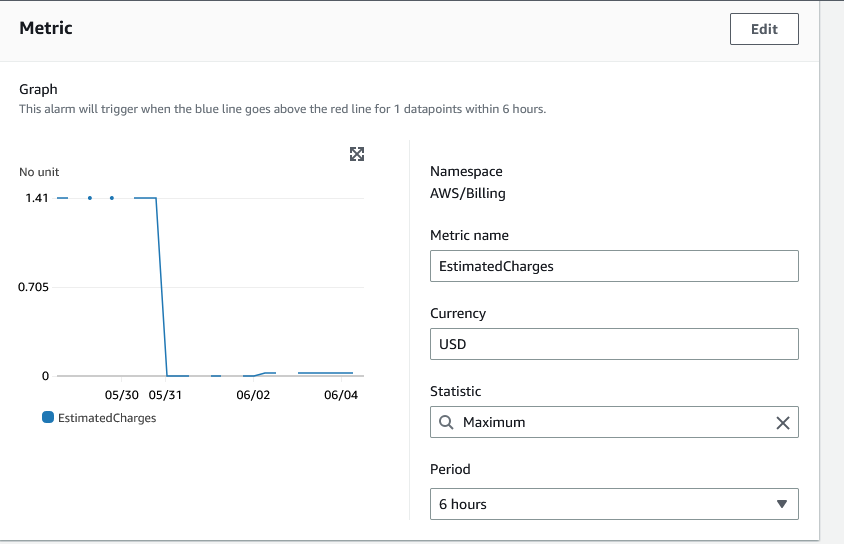
For Statistic, choose Maximum.
For the Period, choose 6 hours.
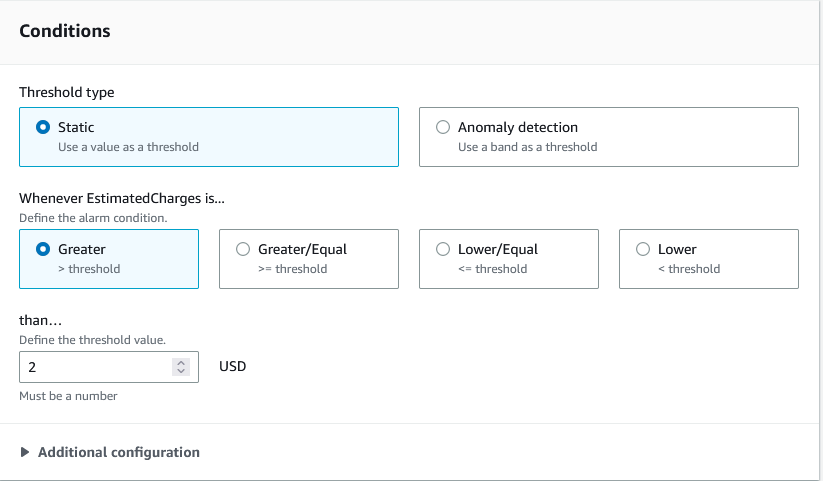
For the Threshold type, choose Static.
For Whenever EstimatedCharges is, choose Greater.
define a threshold value that triggers your alarm. here threshold value is 2$.
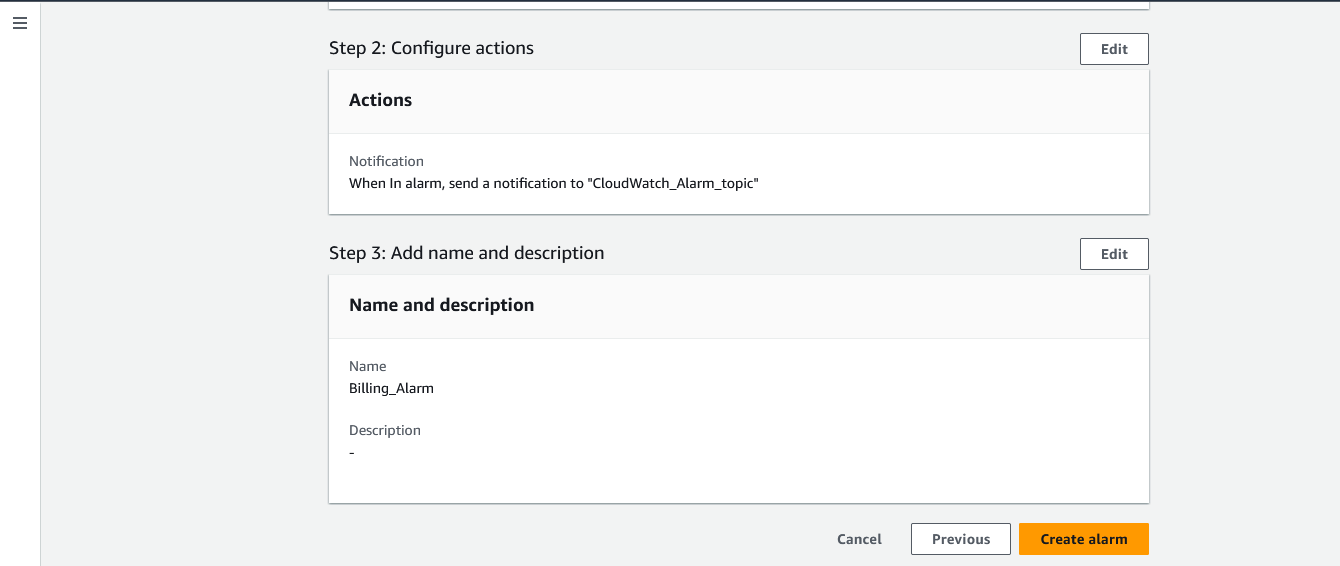
Under Notification, specify an Amazon SNS topic to be notified when your alarm is in the ALARM state.
In the "Actions" section, click on "New Topic" and select "Create new ". Choose the action type as "Send notification to an SNS topic" and click on "Create new topic".
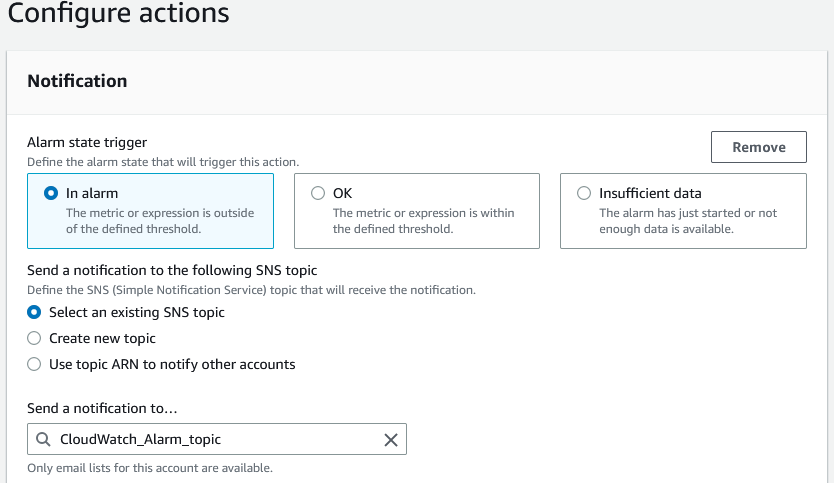
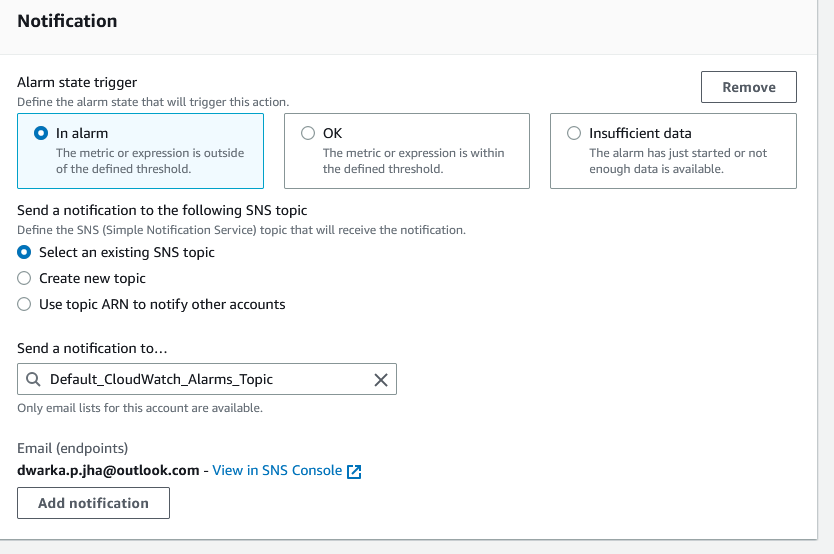
If you want your alarm to send multiple notifications for the same alarm state or for different alarm states, choose Add Notification.
choose Next.
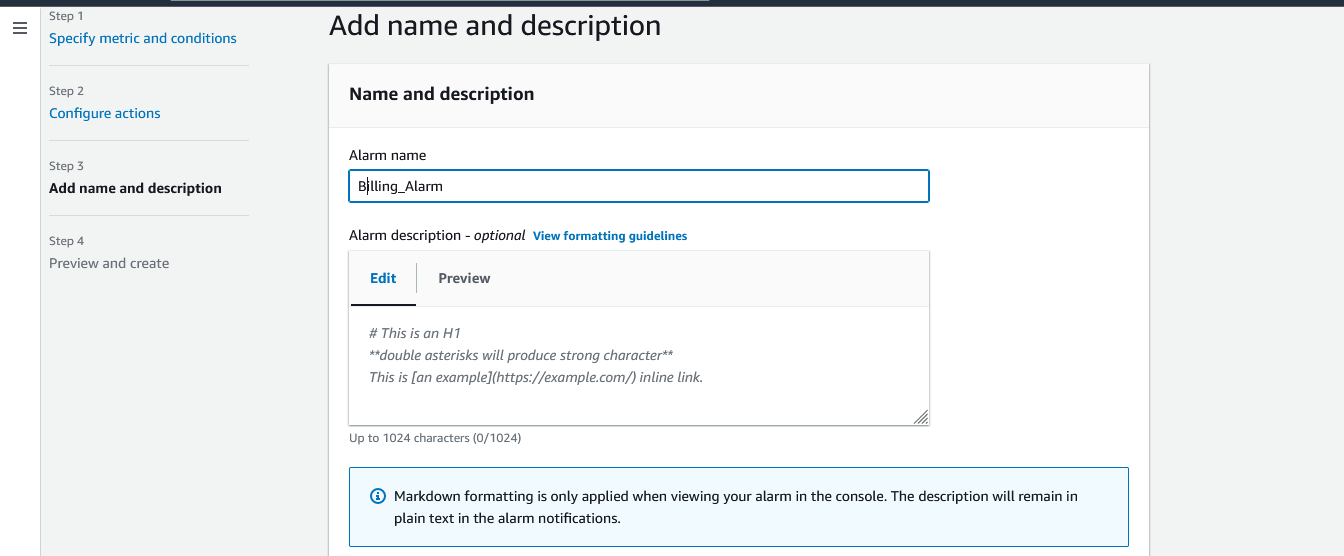
Under Name and Description, enter a name for your alarm.
Under Preview and Create, make sure that your configuration is correct, and then choose Create alarm.

A billing alarm is created.

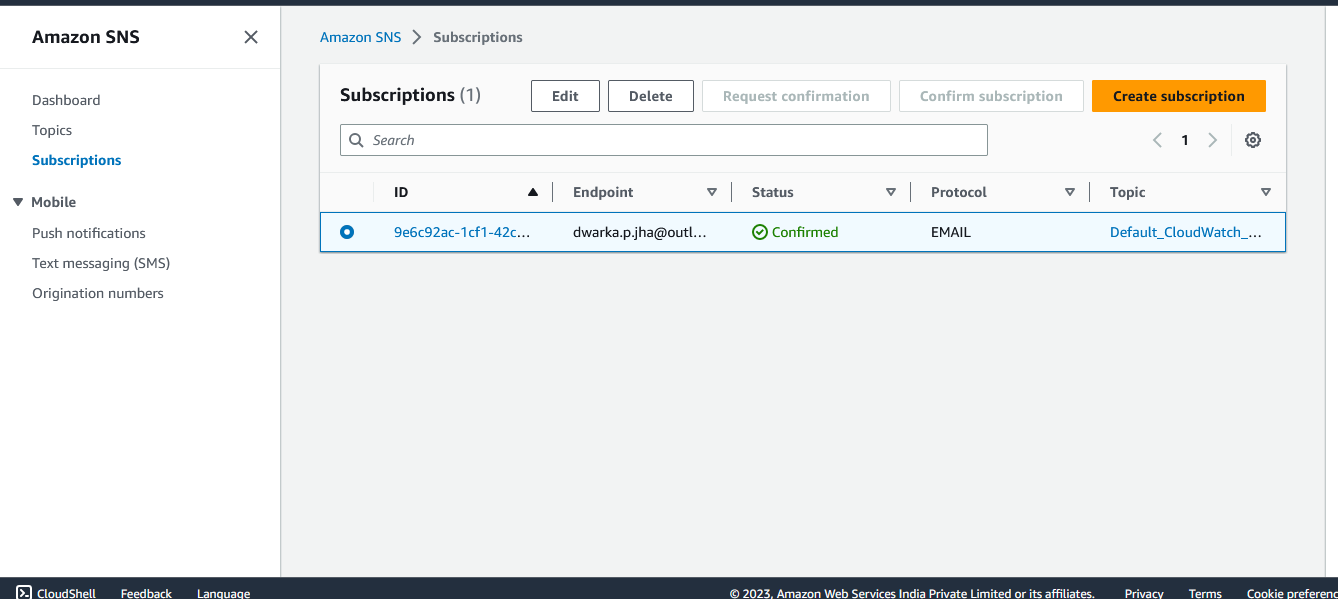
Click on View SNS Subscription. Select the checkbox and click on Request Confirmation. By doing this, you will receive an email to your given email id. Click on Confirm subscription from your mobile device. The status will change to Confirmed.
Delete the billing Alarm that you created now.
Select the checkbox of the alarm you want to delete. Navigate and click on Actions. Under it, click on Delete. Again click on Delete.
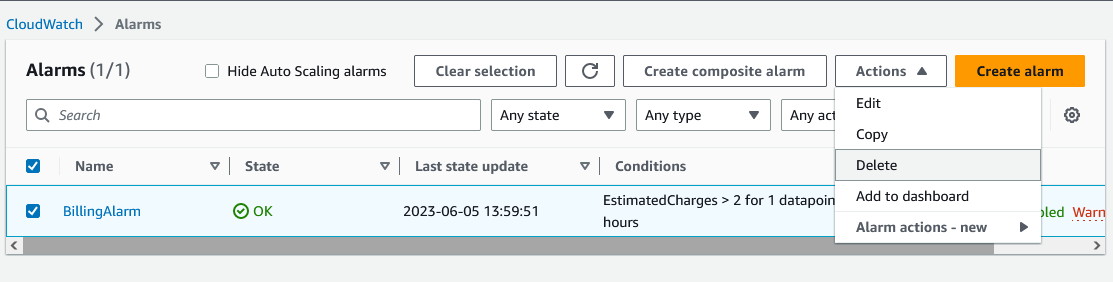
Your alarm will get deleted.

Thankyou....


